Immersion blenders are a powerful appliance to have in your kitchen. They are incredibly versatile and also take up almost no space. I happen to own both an immersion blender as well as a regular large jar blender, but this article is going to highlight and focus on all of the things that you can do with just immersion blenders. In many ways, an immersion blender is one of the most versatile tools in your entire kitchen.
For friends of mine that don’t own an immersion blender, and who are considering getting one, I usually mention all of the cool things you can do with one. So, since I think it’s helpful for people who are considering buying an immersion blender, I decided to draft up a list of the most useful things you can do with an immersion blender.
They’re really very useful blenders, and in many ways they are even more versatile than normal jar blenders. Let’s jump right in and see what you can do with these stick blenders.
Puree A Soup And Make It Smooth!
The first thing most people see when they look up immersion blenders online is some recipe for soup. And there’s an excellent reason for this. Immersion blenders work wonders with soup. They can transform a simple soup into a beautiful, smooth and creamy soup. Everything from silky smooth tomato soups, to smooth cream soups, are super easy to make if you have a stick immersion blender.
The reason that you can easily blend up soups with an immersion blender as opposed to a regular jar blender is that these blenders easily fit right into the soup pot. So, if you were making a smooth tomato soup, for instance, and you want that same pureed texture as you get with something such as Campbells soup, then you need to puree it up in a blender. With a regular blender, you have to pour the hot soup into the blender. And there are a lot of blenders that simply don’t handle hot steaming soup. If you are using a cheap blender and not a good brand such as Vitamix, then the steam can hurt the seals on the blender. Some of the cheap jar blenders aren’t even rated to handle hot soups and hot liuid.
An immersion blender will let you stick the blender (the reason that these blenders are often called stick blenders) right into the pot and puree the soup as it cooks! I’ve made tons of pureed soups this way. Everything from black bean soups to creamy tomato soups.
Make Whipped Cream With A Stick Blender
I have a whole article that discuses if you can make whipped cream in a blender.
Obviously if I wrote an entire article on it, it makes sense that it’s something I consider a benefit. I’ve made whipped cream with an immersion blender probably more often than making whipped cream with an electric whipper. It’s simply so easy to use a stick blender that I do it more often than not using that technique.
When you are planning on making whipped cream, the easiest way to make it using a stick blender is to pour the cold cream into a mason jar or some other narrow and high sided container. Then use an attachment for the blender that helps with aeration. The stick blender that I have came with an aerator attachment, but honestly you can simply use the regular blening attachment as well.
The trick to using a stick blender when making whipped cream is to make sure you use a jar or container that is narrow so that the cream won’t spread out past the surface area that the immersion blender will be able to whip it. My personal preference is to use a strong mason jar (make sure you use a real mason jar like one made by BALL).T
Then stick the immersion blender into the jar and blend the cream. I always use cold cream and sometimes I chill the mason jar. Just remember to make sure that the mason jar is clean and dry. Any moisture in the mason jar can effect the whipped cream process.
The upside to using a stick blender to make whipped cream is that you have same control over the whipped-cream as you might with a regular cream whipper. And a stick blender is much simpler and easier to clean up than a whisker with all of those attachments!
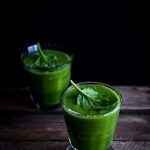
Blend Up A Fast Smoothie
A stick blender is amazing at blending up a quick smoothie. Immersion blenders are perfect for making a single serve smoothie because you can use a smaller container to blend the fruits and vegetables (if you are into making green smoothies) and you don’t have to use large blending jars.
There have been many times when I’ve wanted a smoothie, but if I was to use my large blender (I own a Ninja blender) then I’d end up with too much. Now, you can always take your excess smoothie and store it in the fridge for later, but I sometimes don’t want to do that. Most of the time, if I’m making a smoothie, I want to drink it right away. The whole purpose of making fresh smoothies at home, be they fruit smoothies or green smoothies, is that you are getting the freshest, most nutritious smoothie possible. So, storing it and letting the nutrients devalue, isn’t ideal
Make Real, Homemade Mayonnaise
If you read Bon Appetite or watch cooking videos on YouTube, then you’ve seen countless people talk about homemade mayo. It’s as if no one is buying Helmans anymore. The pitch is basically this: homemade mayo tastes better, is healthier, and isn’t that hard to make.
Everyone from Julia Child to Gordon Ramsey has a recipe on their website or cookbook that details how to make mayo. It’s an easy recipe once you get the hang of it. The basic recipes are all the same. You will need to have egg yolks, vinegar, canola oil (this is the classic oil used when making mayonnaise, not olive oil which is used when making aioli) and mustard.
I have a bit of an issue when using raw eggs, but if you’re confident in using raw eggs, then this is another recipe that you can use your immersion blender for. Basically you will want to take two egg yolks, about a teaspoon of vinegar, some dijon mustard or Colemans mustard powder and a cup of so of oil. Most cooks will reccomend that you use canola oil or something else without a strong taste. Here’s a video to demonstrate how quick it is to make mayonnaise with an immersion blender.
Blend Up Raw Organic Pico De Galo
This is a type of salsa that is popular in the SouthWest and in most parts of rural Mexico. It’s a bit different than typical red salsa or green salsa in that is it chunkier and has a more dry consistency. The term literly means Roosters Beak. That might have something to do with the bite from the peppers, although there is differing interpertations as to just what exactly the etymology of the name derrives from. Whatver the meaning and history of the name, this sort of salsa is one of the best and most versitile in your kitchen.
If you’re a vegan or vegetarian, it is a wonderful addition to your diet as it not only provides you with a ton of healthy nuteirnts from the peppers and onions, but it’s great at spicing up beans and rice and even tofu dishes (not classically a Mexican dish, but nevertheless it is something to look at).
There are loads of reciepes online, but they all basically come down to using peppers (most people like to suggest using Serrano peppers) onions and tomatos. Here are three recipes you can check out: Rick Bayless Pico De Gall recipe,Cookie & Kate, and Cookie & Kate.
I have made these salsas by hand, and also in a food processor. Most peole would tell you that making them in a good food processor such as a Cuisinart is the best way to go about it, but I’ve found that if you have an immersion blender with a chopping attachment, then you can end up with an excellent Pico De Gallo.
All you have to do is place the chopped tomatoes, sliced onions, and peppers into a mason jar or other narrow blending jar and you can pulse it a few times and end up with a nice, crudely chopped salsa.
You Can Make Salsa : Salsa Roja
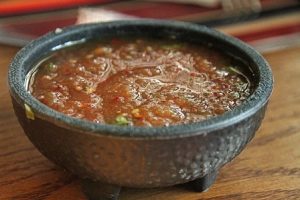
Ok, so now that you know that you can make Pico De Galo, why stop there? You might as well make the classic red salsa (salsa Roja) with your immersion blender as well. These salsas are easy to make in a blender and I recoken that using an immersion blender is even a better idea than trying to make salsa in your big jar blender. Why? Because of control.
When you’e blending with an immersion blender, you have much more control than you do with a normal jar blender. A stick blender allows you to move the blending angel around and hit the tomatos and peppers and onions percisely the way that you want to. You also get a much better view of what you’re blending when you use a stick blender. There is no risk that you will over blend anything when you use a stick blender.
I buy fresh tomatos and peppers (i like my salsa hot so I use jalepano peppers) and then use fresh squeezed lime juice. Then I blend everythign up in a mason jar. When I am done blending everything in the mason jar, then I simply cap it and store it away in the fridge. The reason I like to use a stick blender when making salsa? Easy clean up. I can make a batch of fresh salsa like twice a week and I don’t have to spend time cleaning a large blending jar. This is especially helpful if I’ve happened to have made a smoothie in my Ninja earlier in the day and I don’t want to go ahead and blend in it again and go through another washing. I can just clean the stick blender in the sink by submerging the stick part of the immersion blender in water and using soap and bubbles!
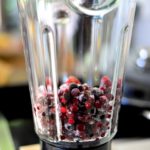
You Can Make Delicious Jam
Homemade jam is delicious and it’s relatively simple to make if you have the right tools. And those tools are:
- A heay duty saucepan or double boiler.
- An immersion blender or stick blender.
- A mesh strainer.
Jam is simply cooked down berries and sugars. The process involves taking berries such as blueberries or raspbnerries and cooking them with sugar. The cooking process helps to breakdown the fiber content of the berries and also allows for the sugar to be absorbed into the mash. And the next step involves making that mash. In olden times, berries were mixed by hand using a wooden spoon. They were mashed into a sweet berry mixture. Then they were strained. This mixture gave you the jam. Sometimes people did not strain the jam, while others did strain out some of the moisture which could then be used as a syrup!
The way that I’ve made jams using an immersion blender was to heat the berries and sugar, and use the immersion blender to mash them up. I will sometimes blend up the berries beforehand in a cup and then add them to the saucepan with the sugar. This speeds up the process and reduces the chance that the berries and sugar will burn before they join together in a sweet harmony!
So, if you’re someone who likes raspberry jam or blueberry jam, and would like to try making it…then go ahead. For a thicker jam, strain out some of the liquid after you’re done heating the mash. If you want a regular style jam, then just let it cool a bit, add a touch of lemon juice, and place it into a mason jar or some other small glass container.
You Can Make Hummus
I’ve covered it elsewhere on my blog, but I think it’s a good time to discuss hummus and wheather or not you can make it with an immersion blender! So, for starters, I would suggest that you are best suited to using a food processor when you are looking to make hummus. That’s simply because a food processor is the easiest to use and you can literly make hummus in under a minute. There are countless recipes online.
However, if you do not own a food processor and you want to make hummus and you only have an immersion blender, then you most certainly can use it. There is no reason that you cannot use a stick blender to make hummus if it’s your only tool. It might not be as versitile as a regular food processor, but you most certainly can make it. Here’s a quick video showcasing the process.
I’d still suggest using a food processor, or even buying a food processor if you don’t have one and are planning on making lots of food at home from scratch. They are helpful (pie crusts, hummus, falafel mix, sliced vegetables…and so much more).
Pesto Is Easy To Make Too!
If you like pesto, and you want to make it fresh at home, then an immersion blender is amazing! These are stick blenders are even better at making pesto than large blenders. The reason is that large blending jars are simply too big to use with pesto. Unless you are making a huge serving of pesto, a regular sized blender will not be useful.
The problem with using a big blender when making pesto is that the jar is too big and it won’t adequately blend up a small amount of basil and olive oil and pine nuts. So, instead what I always recommend is that you use either a stick immersion blender or else a bullet blender. That way when you pack in the basil and pine nuts and oilve oil, it will all blend up easily and you won’t be left with unblended material.
You Can Make Soap With An Immersion Blender
Finally, and this one might come as a shock to anyone who only thinks of food recipes when it comes to blenders, but you can make soap with a blender. Namely, a stick blender!
The method of making soap is complicated and if you’re looking to make soap, I have a pretty comprehensive article that covers the best blenders for making cold process soap and also what materials you need in addition to a blender.
Basically, a stick blender is going to be an essential part of any soap making process. When you are looking to mix the lye water and the fats (oilve oil or coconut oil) you need to use a stick blender. It’s too dangerous to use a regular blender and if you try and do it by hand like they did before the invention of electric blenders, you will wear yourself out.


Hi Everyone!
Just a normal blending fanatic here to share all my tips with you! Ha ha
I have more info about what go me started with blending in my bio page.
To get started, check out my articles on the best blender for green smoothies or my review of single serve smoothie blenders.
If you have any questions, or you’d like me to cover a particular topic, drop me a line and let me know!
Thanks!